Sainsburys have their new summery stuff in their housewares department and, while I am usually immune, I have to look just in case. It's like charity shops: if you don't go in, there'll be treasure and you'll miss it. If you DO go in, there'll usually be tat, but maybe next time!
Anyways, this time they had a lovely lantern and I didn't even hesitate for a second. It HAD to be mine! Its a beaten-up blue metal on the band and clasps, and lovely strong glass with a thick, hairy rope handle. It stands about 25cms tall and is gorgeous!
Here it is in the daytime...
and here it is glowing all piratey at night...
Two points to note: firstly it was not recommended for use with tea lights and the rim where the glass narrows did get rather hot if left alight for too long (so I didn't leave it more that 30 minutes and have since bought a pillar candle as recommended and that's fine).
And secondly... you can carry it by the rope handle even when the candle is lit and not get a hot hand.. so you really can pretend to a be a pirate!! (Yes I know you don't DO that kind of thing, but I do!!)
Last week I bought a Tim Holtz configuration box. I'd seen them on TV but not in the shops and was surprised and pleased to find it was within my price range (you never know with his stuff - quality but not cheap).
A configuration box is a box with lots of little boxes in that you can arrange different ways, to "really make it your own" as they say on TV singing shows. Previously I've made my own from scratch and it felt odd and daunting to be using someone else's.
It comes with a suggestion sheet to help, or you can treat it like a puzzle and try your own.
Well, nothing I tried felt like it was mine until I decided to cut three quarters of the bottoms out of some of the boxes and put them in upside down so they opened like little doors.
A bit scruffy looking but definitely mine now! I used tissue paper and watered down PVA glue to smooth the cut edges,
and then painted them and the outside box a woody-brown and then varnished them.
Then I lined the backs of the boxes I had not cut (to match the others), added brass split-pin handles and glued them all in place to be filled with treasures.
Its a little higgledy piggledy but I like the way it keeps most of it's treasures secret until you open the doors. I have yet to find something suitable for the larger box, but I might put stairs in it and a tiny library of books (the boxes are not very deep so that dictates contents somewhat).
The lovely blue pocket watch thing in the corner is, in fact, a large blue glass drop with a stamped image behind and leaded edges. My sister and her husband have just started making them and they're beautiful! I bought 2 as soon as I saw them!!!
Sorry I can't show you in all the doors but it's hard to hold them open and photograph them. If you ever come round in person, you can play. If not, you can just imagine!
Is that how you spell it? The style of making a pattern, usually with glass I think, then rolling it out really small into a long rod where the pattern goes all the way through (like words in a stick of rock at the seaside) and then cutting it into thin pieces and making a tiny repeating pattern from it.
For the real version, check out Google images, or for my Eastery version, check out here
They were real hens eggs,boiled for about 30 minutes because I'd read that they would last forever after that and not go mouldy. Apparently what was left inside would gradually get smaller and harder till it was about the size of a marble (not that the author knew I was going to use Sculpey but that was the principle for traditional egg decorating.
I gave these away to family at Easter about 5 or 6 years ago and only have the photos I took at the time so I can't get more detailed images but I expect you can click them larger by computer magic if you want to.
Happy Easter!
At last an answer to that eternal and infernal question: Which came first, the chicken or the egg?
As they used to say in their advertising campaign of many years ago: Only Smarties have the answer, and here it is! It's neither. The real answer is Mini-Smarties came first and here is the proof!
It appears the chicken came first, wrapped or unwrapped...
BUT THEN, inside, there is an egg, so the egg must have been made first to be placed inside the chicken shape as it was poured/ fitted together.
JUST WHEN THAT SEEMS CONCLUSIVE PROOF that the egg came first... inside the egg there are Mini-Smarties.
So THEY must have been made before the chicken AND the egg to be put in there in the first place! And there we have it. Indisputable and DELICIOUS proof that neither the chicken nor the egg actually came first, but they were very tasty.
My son, like Smaug and Pirates, is totally obsessed with GOLD!
It's lucky that brass and plasticky gold still counts as gold otherwise he couldn't follow his collecting instinct and build up his hoard. For a while now he's been mentioning that he'd like a treasure chest in his room (the little plastic or cardboard ones don't count), so this holiday I got the old toy box (flat-packed B&Q job you screw together yourself) that he used to have out of the shed, removed the snail droppings from it, and set about transforming it.
A couple of coats of thick brown paint...
and it looked lovely and chocolatey.
Then I used the roll of thin brass metal I've had for years
to cut corners and punch holes into them to use brads to look like nails or tacks or studs in the corners.
When varnished the box had a deep rich colour and was ready for a lining...
which of course had to be gold,
and then to be placed in situ and filled with all the treasure he possessed.
That was a process executed with reverence and love.
And the verdict from the gold-obsessed creature? "We need more gold to fill it to here!"
I had the most beautiful umbrella which made standing in the rain waiting for a bus into a real pleasure. Hard to believe I know, but it was like standing under a shower of giant chocolates, each nearly as big as your head... what's not to love?
One day, while waiting with my son at the bus stop, he decided to try and jump over the closed umbrella and, as well as causing himself a few moments unexpected discomfort, he broke the handle! I went into mini-mourning for a beautiful object made completely useless, even with a splint to try and hold the central stick together (useless cos the central mechanism can't slide up and down as it has to to open the spokes).
Then I saw a tutorial online for making a dead umbrella into a shopping bag . I remembered the 6 steps, which is just as well as I've never found it since. They were...
1. Remove the fabric from the frame carefully
2. Take each triangle of fabric apart (I thought this was going to be hard and take a long time but in fact once cut at the top, which you have to do to get it off the frame, the seams just come apart easily, so I can see why you have to do it or they'd fall apart when they were a bag).
3. Sew three of the triangles together alternate ways up... so 1 and 3 and upside down and the centre one is the right way up (keeping the pattern of the fabric face to face). This makes a large area of fabric almost square.
4. Cut the outside triangles up the middle till the whole fabric piece is now a square/ rectangle. Repeat all the above till you have 2 identical pieces of fabric.
5. Keeping the pattern of the fabric pieces face to face, sew down, across the bottom and up the other side to make the bag shape and fold and sew the top over to make it stronger and neater.
6 Use the leftover triangles to cut long rectangle shapes to sew into tube shaped handles and sew these to the top of the bag.
If these don't really make sense, type a mixture of the words broken, umbrella, make, bag etc into a search engine and tutorials will appear like magic, probably different to this but similar.
And here is the result...
You can see from the pattern where the triangles and half triangles go and that may help the instructions make more sense. I should have taken pictures as I went along but I get so carried away with doing it that I forget to stop!
Instead of sheltering from the rain under delicious giant chocolates, I can now go shopping with them and the fabric gets to live another day!!
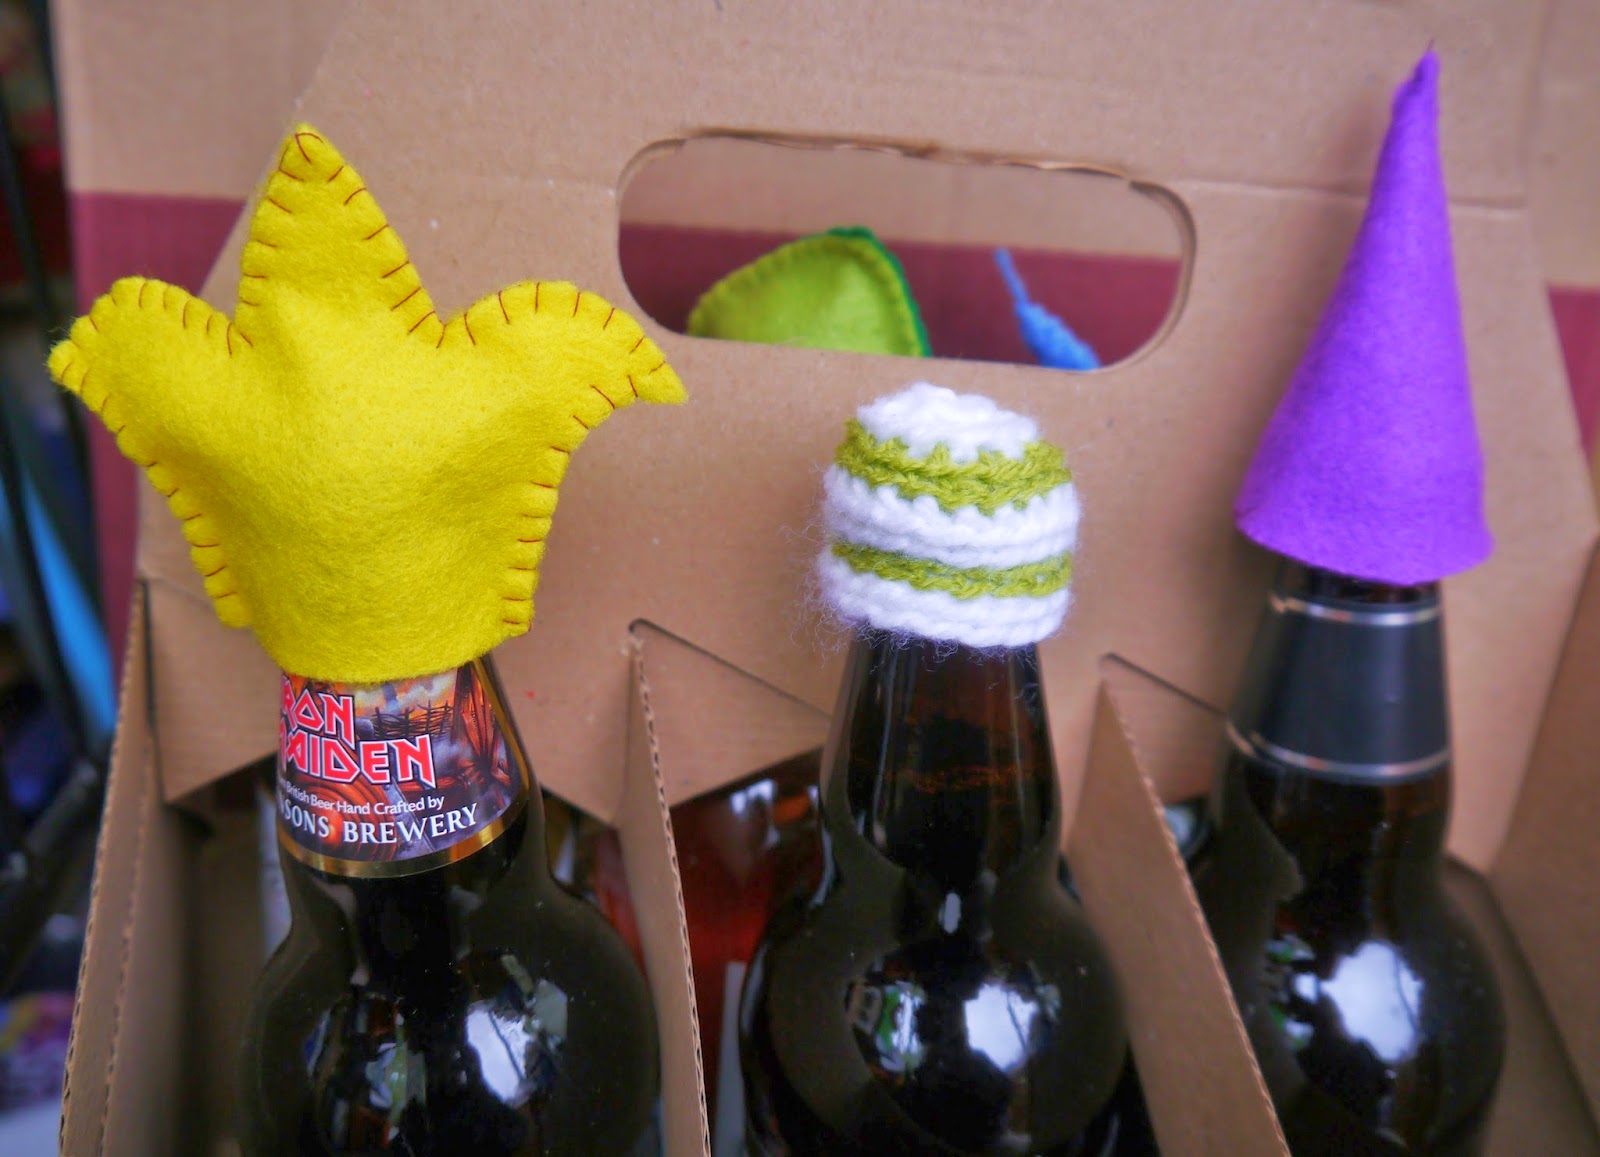
It was my grown up nephew's birthday a short while ago and, as he likes beer, we bought him some good bottled stuff that he might not have tried before. But as the bottles stood there in their cardboard container before it was wrapped in birthday paper, they looked a little.... BALD!
I had been fancying doing a bit of sewing and crocheting recently but couldn't think of what to make.
There were all the resources just waiting for inspiration...
... I know! Hats for beer bottles! So here they are...
Ones with a tail, feathered Robin Hood-types, or pom pom bobble hats...
... jester, rasta or wizard! Whatever the bottle wanted, it got. A hat for all occasions!
Here is a box/ display thing I was given for Christmas cos the person who gave it to me knew I'd been making similar things over the last year and wanted to facilitate more!
Its more tricky working with something that is pretty much finished already so I took some things away (more black, less pattern)
and added others: black foliage.
It helps if you know what you want to put in it and this box said B to me as soon as I saw it. So many things made by my good friend B are now residing in it!
That includes felt creatures, needle felted animals, amigurumi and Hambles as well as a lovely fossil stone replica from Animal Crossing game! Thanks B.
If you haven't already done so, checkout
https://www.facebook.com/HambalsAndFriends